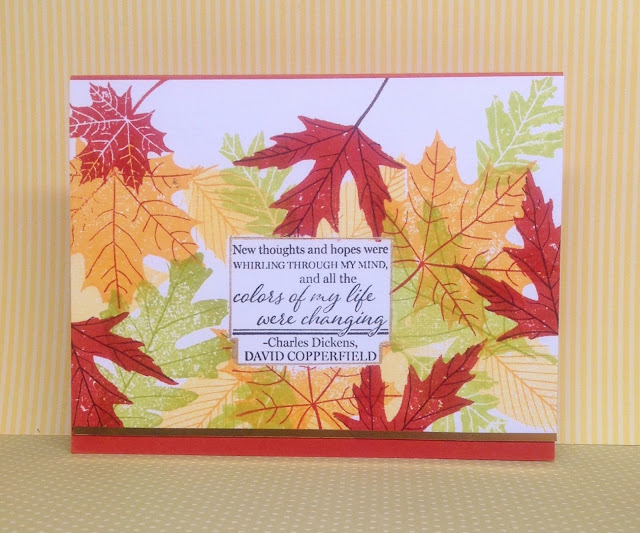
Friday, December 4, 2015

Make it Monday #233: Splattering

Danielle (shown here) is showing us some wonderful splattering skills this week, using a fine spray along with splatters. I have been busy doing over 30 Christmas cards, all using spatters to make either stars or snow on my cards. Here are just a few of them.
This first one uses the new Petite Places: Nativity stamps. I tried many different ways to do the background: mainly painting with watercolours, or using Distress inks sponged then either spritzed with water, or picked up with a paintbrush. For the stars, I splattered with water first, then with white paint. For some of the cards, I brightened up the splattered snow with a white gel pen, or a Perfect Pearls solution for the stars.


And here are just a few more, trying various colour schemes.  Thanks for looking!

Wednesday, November 25, 2015

November 2015 Blog Hop Challenge


Wow! One month till Christmas!!! This month's inspiration photo, over at Papertrey Ink, really intrigued me! I love the white and silver with the blues and greens!

Blog Hop Inspiration


And here's what I came up with. I used Postmarks: Holiday, and the sentiment is from O Tannebaum, both Papertrey Ink stamp sets. I heat embossed the center tree in silver, and used Distress Inks, as well as some PTI inks, to "paint" the other two trees. The center panel is matted onto a piece of Tropical Teal cardstock and some silver stars finsh it off. Love these colours together, and can't wait to see all the cards today, using them!
Thanks for looking!


Friday, November 6, 2015

Make it Monday #229: Fabric Strip Christmas Trees

Melissa showed us how to make these Christmas Trees, (seen here). She used hers on a card, but I made them into ornaments for my granddaughters. I used cinnamon sticks for the trunks, and some fabric I had on hand. I like the bells for ornaments, but I'm not sure the red gems added anything good to them... But they're on now, and I am NOT going to redo these! Doing these fussy bows and knots is difficult! My hat goes off to Melissa, who does all of these things to perfection!

PTI: paper for tag, and the heart stamp

Wednesday, November 4, 2015

Sharing Handmade Kindness: Challenge 1

Jennifer McGuire is hosting a series of challenges, shown here. This week's challenge is to make something homemade for a friends or family. I've made two cards for my granddaughters. My 3 yr-old granddaughter requested a card with balloons, and my 9 yr.-old granddaughter has a fishtank, so that card will be for her.


Saturday, October 31, 2015

Make it Monday #228 - Pearlized Blending

Well, Lizzie did a wonderfully CAS, pearlized card this week, over at Papertrey Ink. Loved hers! Mine, well I don't love it nearly so much... But seeing as how it is for my 3-yr-old granddaughter, I guess it will do. She requested a card with balloons on it several months ago, so here it finally is. (I was Casing a card done by Laura Bassen, way back when Shaker Shapes:Balloon was released.)

It's the pink balloon which has the most Perfect Pearls on it, which you can see better in this photo.
Thanks for looking!
Stamps: Give Me a Hand (PTI)
Dies: Shaker Shapes: Balloon, Balloon Strings
Inks: Distress Inks, Versamark
Other: Perfect Pearls


Saturday, October 24, 2015

OCT. 2015 Blog Hop Challenge


 Papertrey's October challenge has this inspiration photo for us. Well, it's Christmas, obviously ;)

Blog hop inspiration

So I went with the red and green colours, Casing Dawn's beautiful card for my design. (See below)
DSC_6967.1


And here's what I ended up with. I used Distress Inks, spritzed with water, for a watercoloured look. I'm not-so-patiently waiting for my Spruce & Sprigs stamp set to arrive, but tried for a similar look using Holly and Mistletoe stamps and dies. The greeting, from O Holy Night, is heat embossed in gold.

I love a touch of gold on a Christmas card! Here's a close-up of the flower centers. I used a gold pen to make the dots, as well as for the "dashes" on the holly leaves.

Make it Monday #227: Focal Clusters

It's been quite awhile since I entered a challenge, so I can attest that it's true--you're busy when you're retired!
While looking at the video for this challenge, the stamp set "City Scene", from PTI, came to mind, so I gave it a whirl. I must admit, though, that leaving a whole corner bare...just. isn't. me! I had to force myself to leave it alone. (But we'll see if some snowflakes get added later. Just sayin'!)
You can't tell from this photo--it's a dull, foggy day--but I've added some Zig Wink of Stella on the trees, along with some glossy accents on the tree "lights", as well as the taxi windows.
Thanks for looking!


Wednesday, August 19, 2015

Make it Monday #221: Masking Sentiments

Ashley has challenged us this week to create a card that uses a sentiment, which is masked. I chose to use a sentiment from "Book Club", and surround it with leaves from "Leaf Prints". I've used this set for 3 other cards this past week. Love it! My inspiration was a card of Heather Nichols, found here.  I loved hers, and have been wanting to CASe it. My card will be an anniversary card for my sister and her husband. Inside, it continues the book theme (All from "Block Sentiments") . It says:

LIFE IS A STORY. 
Make it a Best Seller. 
HAPPY ANNIVERSARY

Thanks for looking!

And while I'm at it, here are the other two cards I've made this past week. The first one is another anniversary card for my son and daughter-in-law, and the last one is a card for a friend's birthday, which was entered in last week's Create Along With Us.


Thursday, August 13, 2015

Create Along With Us: Aug. 2105

I was greatly inspired by two cards, on the first day of PTI's August Release. Both Heather Nichol's and Dawn McVey's leaf cards are gorgeous! I definitely want these dies and stamps as I love the size!!

But since I have to wait to get these products, I was inspired to try something similar with the leaves I already have ;) I used Leaf Prints Stamps and dies, as well as the leaf sprigs from Songbird. First, I sponged a variety of Distress Inks onto watercolour paper, then sprinkled a little water onto it. Then I stamped the veins in Versamark and heat embossed the veins in gold powder. A sentiment from Dawn's Signature Greetings finished it off. This card is going to a friend of mine next week, for her birthday. She's a forester, so appreciates all growing things :)

Thanks for looking!


Saturday, August 8, 2015

Make it Monday, #220 - Diecut Mini Notebooks

Melissa had a sweet summertime project she shared with us: Mini Notebooks! After looking at the gallery, I was inspired to do some crafting. I will be visiting my granddaughters later this month, so made them a booklet, each.
I haven't used this stamp set nearly enough (PTI's Scentimentals), so this was my chance to rectify that! I didn't have much luck with making these stamps into scratch and sniff projects, but coating the stamping with Glossy Accents was another way to use them.
Thanks for looking!

Monday, August 3, 2015

One-Layer Simplicity Challenge #19- Strip Down

Well, doesn't that title catch your eye?  This is my first time posting in this challenge, and, since I am trying to do more CAS cards, I thought I'd give this a whirl. Plus, I'm trying to turn over a new leaf and make Christmas cards sooner than November, so here goes.
I masked a strip down the side of my card and sponged 3 inks, 2 Distress Inks, and Delicata Gold ink in the middle, overlapping the red and green inks. You can't really see the shine of the gold ink in this photo, though, unfortunately. A star and a simple jewel embellishment finishes it off.

And, because I might as well do two, I did another strip. I didn't mask off enough area, however, and accidentally sponged ink over the tape and onto the card front. Sigh. So, I trimmed out the strip, and glued it down onto a new card. So this one is technically 2 layers and doesn't qualify for this challenge. However, I jazzed it up with some stamping and some colouring with my Zig markers, and liked it even better than the first one (told you I have trouble with CAS)! Okay...2 down and 28 to go!


Wednesday, July 1, 2015

Make it Monday #216: Adding Colour to Cover Plates

Happy Canada Day!  Well, it's nice to be back! I've missed the challenges lately due to busy-ness, but at least we have a freshly painted interior of our house. I found picking the paint rather challenging, though--it's not like choosing paper for a card! And I'm exhausted from moving furniture, books and other paraphernalia!! Heaven help me if we ever have to move...

The challenge this week was to colour a Cover Plate, so I used the new "Waves" plate from PTI. Instead of just doing the plate, however, I painted the whole thing. I liked the texture that the negative portions of the waves gave to the whole panel. I used Distress Inks to paint a panel of watercolour paper, adding the Lighthouse and sentiment from the new "Guiding Light" stamp set and dies. (Must practice stamping these lighthouses, though...)

Thanks for looking!


Sunday, June 7, 2015

Make it Monday #213: Condensation Effects

Betsy has us using our Glossy Accents to make some "Cool Condensation" on our cards. Now, does she mean "cool" as in temperature? Or "cool", as in an "interesting effect"?? I guess both apply ;)

Anyhoo, here, at the last minute, is my effort. I used the flowers from "Flower Favorites", and the vase is from "The Ton" stamps (Peonies). The sentiment is part of a sentiment from "Banner Sentiments" set, selectively inked. I die cut and stamped the flowers, then watercoloured the background, as well as the water in the vase. I cut a slit in the top of the vase to tuck the die cut stems behind, then stamped the stems into the vase of water in an attempt to make it look more like the stems were IN the water, not glued on top, like the flowers.


 And here is a close up of the "condensation" on the vase, as well as a bit of the dimension of the flower hanging over the top of the vase. The Glossy Accents are not dry, yet, but I have to get this posted!
Thanks for looking!

Sunday, May 24, 2015

May 2015 - Blog hop Challenge

This month's Blog Hop has the following inspiration photo for our cards.

                                                  Blog Hop Inspiration

My cards are very loosely based on the rainbow cascade of the blocks. I went for a watercoloured background, choosing to not use the square shapes, focussing just on the colours. See that one rogue purple block in the lower right corner? I just had to put that in my first card ;)


My second card is a variation on this same theme/layout, since I needed 2 birthday cards for family this month! These are not my usual style, which is to gravitate for lighter, less vibrant colours. (Going a little out of the box, this month...)


Stamps: Brushed Blooms (and dies), Sentiment Strips (and dies)
Inks: Distress inks for the background, PTI inks for the flowers and sentiment, as well as Versamark ink and white filagree embossing powder
Thanks so much for looking!


Monday, May 18, 2015

Make it Monday #212: Fussy Cutting

Ashley has us digging out our scissors and fussy cutting this week! I never thought I'd see the day... However, it went just fine, and I may even try this again! Lol. Can you tell I don't like fussy cutting, as a rule? However, here is my effort.
The stamps (Brushed Blooms, Graceful Greetings) are from PTI, and all of the paper, except for that lovely lavender background paper, which is from Gina K. (Sure wish PTI would come out with this colour, as well as a true pink! Hint, Hint!) The striped background is from a Hero Arts stamp, I think. I no longer have the packaging...
Thanks for looking!

Saturday, May 9, 2015

Make it Monday #211: Using Gelatos with Stamps


I was intrigued with this week's MIM (seen here), where Melissa gently smudged gelatos over a stamped image. It produced a halo of colour and intensified the ink colours. Loved it, especially on the linen paper! Great texture! I was going to use some new stamps, but when I had a look at the gallery, it seems that everyone else had the same idea (and they are beautiful), but I wanted to do something different. So I dug out good ol' Year of Flowers: Sweet Peas.  I watercoloured the flowers with Distress Inks, then smudged the Gelatoes over top. The blue doesn't show up very well in the full photo, but it's there, giving a hint of sky in the background. Thanks for looking!


Friday, April 24, 2015

Papertrey's April Blog Hop


Blog-hop-logo
Welcome to PTI's April Blog Hop! We have the following inspiration photo to use for our cards.

Blog hop inspiration

And here is the card I've made. It uses the "You've Been Framed: Oval" die and stamps, as well as the flowers and stamps from Bitty Bouquet. For the ombre background, I used a sheet from the "Beautiful Brushstrokes" patterned paper. I felt a bit nostalgic, so dug out some pearl adhesives and an old flourish die for embellishments.
Inks: Sweet Blush, Hibiscus Burst, Berry Sorbet, Enchanted Evening, Limeade Ice
Thanks for looking!

Thursday, April 23, 2015

Make it Monday #209-White Die Cuts With a Pop of Colour

Oooohhhh....Loved the idea for this challenge! I do have difficulty leaving white space, so thought this would be a good challenge to enter.

I used "Zappy Birthday" for my card, and quite like how it turned out. I confess all the white space was kind of bothering me, though (sigh--just couldn't leave it alone), so I added a strip of washi tape to the bottom edge, and then stamped the zig-zag above the row of white "thing-me-bobs"... What do you call those..."star bursts"?? I also popped up the main image on some dimensional squares, for some added "POW"! (I wish this stamp set also included a "Pow!", and a "Bam!" They would have been fun stamps to put in the star-bubble, too.)

All stamps and card stock are PTI. Thanks for looking!

And here's a close up of the dimension.

Wednesday, April 1, 2015

Make it Monday #207 - Double Partial Die Cutting

Well, Laura Bassen has us kicking it up a notch with this challenge! I needed a masculine birthday card, so decided to try out this technique, for this card.
Oh, drat! I just noticed that one of the gold stars fell off! Hmmm...can you just pretend the turquoise balloon also has one? I guess I need to use a better adhesive on that clear embossing powder!
All materials are PTI, unless otherwise noted.
Stamps: Birthday Style
Paper: Rustic White card base, Dark Chocolate, Spring Moss striped, Simply Chartruese, Orange (from my stash), Harvest Gold, Hawaiian Shores, Gold adhesive backed paper (Silhouette)
Dies: Mat Stack 1, Tipped Top, Birthday Trio, Star Gazer Additions, Birthday Style
Inks: Versamark
Other: Clear embossing powder, twine, Wood Grain Embossing Plate, dimensional adhesive, Clear Wink of Stella on the word dies

Tuesday, March 24, 2015

March 2015 Papertrey Blog Hop

Blog-hop-logo
The following photo is our inspiration for this month's hop.


Blog inspiration

I focussed on the colours in this photo, and chose to make a card using the turquoise, yellows and white, with a touch of green. And, since it's almost Easter, I made an Easter Egg card, Cas-ing Laura Bassen's wonderful card, found here, changing up only the colours. Loved hers, but I went with the colours in the above photo. I used my water paints on watercolour cardstock, then punched the eggs out with the egg die. I put a layer of plain vellum over top the striped paper, in order to soften it up, a bit. This card will go to my son and his family. One egg for each of them and the kids, plus one spare for the dog! Lol.
Thanks for looking! All materials are PTI.
Stamps and Dies: Etched Easter Eggs

And speaking of Casing, I also copied....er, Cas'd Betsy Veldman's card, shown here.  LOVED her card, using Easter Alleluias and Itty Bitty Bouquets. (Sorry about the poor photo--I took it on my iPad, not realizing at the time that I was going to post this.)  The colours suit this blog hop, too!


Friday, March 20, 2015

Make it Monday #205: Confetti Cluster Stamping

This week's Make it Monday has us stamping an image with a cluster of stamps, rather than a solid or outline image. I had in my head that I wanted to do balloons, so this is what I came up with.

I wanted to try this technique to make my brother-in-law a card for his birthday. He and my sister are vacationing down south, and won't be home until after his birthday, so I added a "belated" (Avery Elle) onto the "Birthday Wishes". I used PTI's "Birthday Style" stamps for the image and sentiment, and "Wet Paint" for the numbers. (He is turning 66 today.)

For the balloons, I used the confetti stamp from "Birthday Style", and the stars and tiny cluster of dots are from "Star Gazer Additions". I covered the one balloon with Glossy Accents. It's not dry yet, in the photo, as I wanted to get this posted online asap. Off to the PO as soon as it's dry!

Inks used: Limeade Ice, New Leaf, Simply Chartruese, Pinefeather, Aqua Mist, Blueberry Sky, Spring Rain, Tropical Teal, Smokey Shadow, and Hero Arts Soft Granite for the balloon strings.

Tuesday, March 10, 2015

Make it Monday #204: Smooshing with Ink

Ah yes. That highly technical term called "smooshing"...not to to confused with "smooching", as autocorrect would have us believe!

My first effort smooshing turned out quite pretty, but I used too much water and the colours blended seamlessly together, creating an almost sponged-ink look. Nice, but not what the challenge was all about, really.

I wanted to use my new "Scene It" dies, so I cut out a background from the smooshed paper, and built my scene on that. I used the new "Alleluia" stamps, as well as a sentiment from the "Etched Easter Eggs" stamps. Too bad you can't see the Wink of Stella glitter on the sun rays, nor the gold embossing on the "Alleluia" sentiment. It's been foggy all day, here! Love this new vellum from PTI!

My second effort was more what the challenge required, but I wished I would have omitted the Tropical Teal ink--it's too dark! So I tried covering some of it up with the gold embossing, and some flowers from Quilted Spring. I'm not too thrilled with this one...
Thanks for looking!

Wednesday, March 4, 2015

Make it Monday #203: Doodling with Stamps

Ashley showed us a fun technique this week, using doodling over top of stamps, seen here. I used Botanicals Blooms ll. First, I stamped the image, then watercoloured it in. When it was dry, I doodled over top of the paint. Fun! I'll definitely try this again.
 And here is a close up of the detail. (All materials are PTI, except the sequins, paint and Watercolour paper.)